
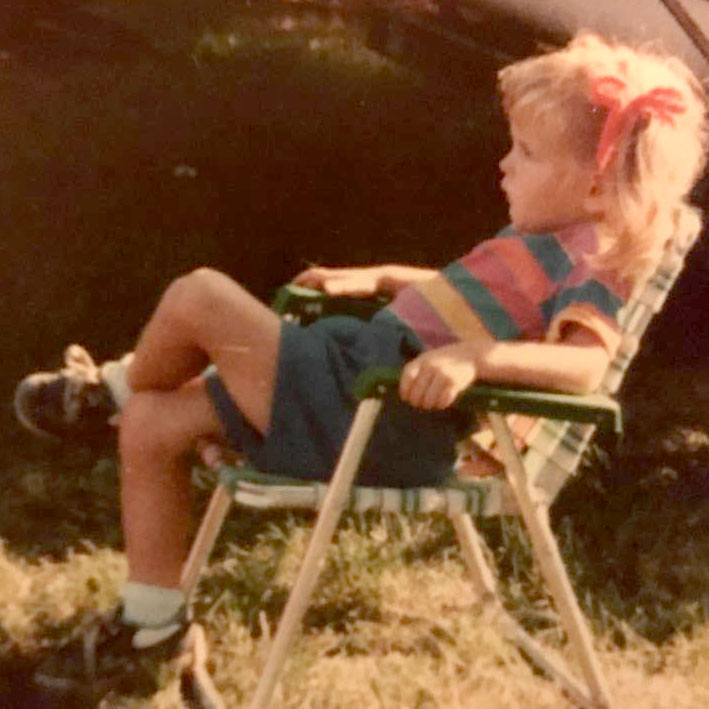
I LOVE to buy old, vintage things, and return them to their original glory…especially vintage camping related things that are full of a history of memories! Nothing says relaxation like lounging by a vintage trailer in an equally vintage aluminum lawn chair, and I definitely have a soft spot for these retro beauties. In fact I still have my own 1970’s child sized lawn chair that I sat in as a kid while camping!
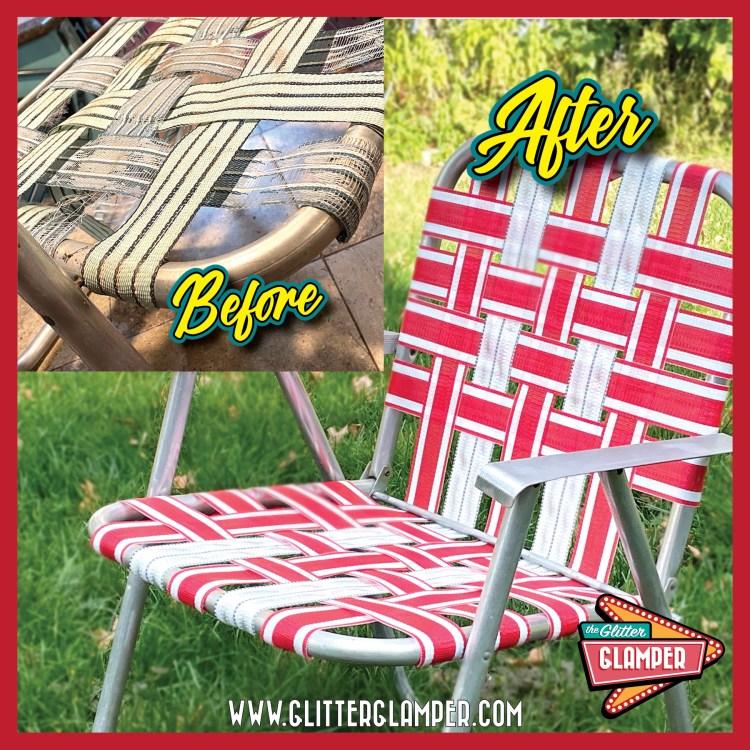
I bought this ratty old lawn chair at a garage sale last summer for $4. It came with a bag of blue webbing…essentially I bought a project the previous owner just didn’t get around to! I decided though, if I was going to go through the work of refurbishing this chair, I wanted the colors that would match MY vintage camper…red and white!! I had some old rolls of white & silver webbing on hand (probably from the stash my Dad keeps giving me, ha!), but I bought a roll of red on Amazon and some new screws. (note…these screws come in packs of 20, but you need 26 to complete a chair!)

STEP 1 – Remove the old webbing. Okay, I’ll admit this was the hardest and most frustrating step because these particular screws were SUPER rusted. If yours are not, it’ll be as simple as un-screwing 26 screws and tossing the old webbing. Many of these screws I was able to remove very slowly with a lot of elbow grease (lots of pressure as they wanted to strip). My husband helped get a couple out with a vice grip, and I also used my set of screw extractor bits, similar to this one. If you can make it past this step or have less stubborn screws than I did, the rest will be more fun and worth it!
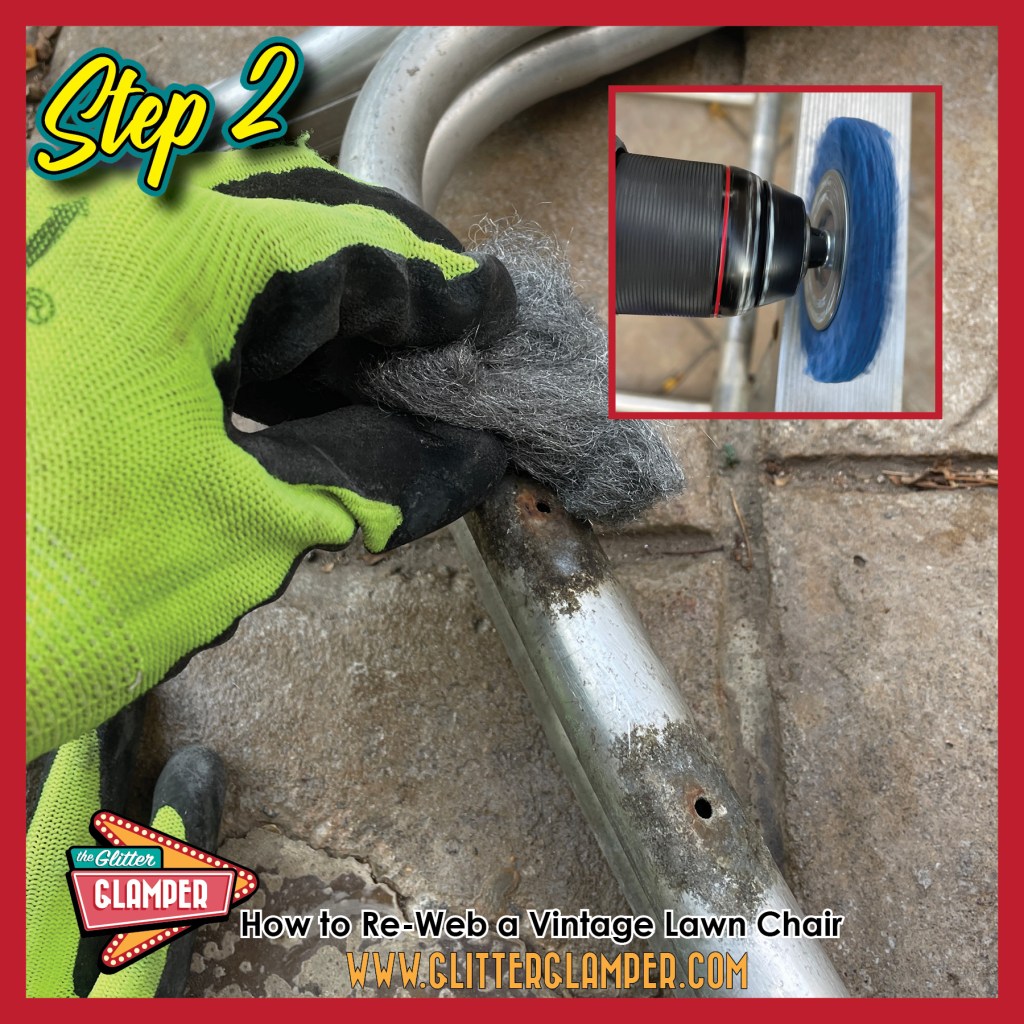
STEP 2 – Remove the crud. If your chair has been stored indoors and is in good shape, you may be able to skip this step! But mine, being so corroded, had a lot of crud around each screw hole. I do get a strange satisfaction out of polishing up chrome and aluminum with steel wool, so I didn’t mind this part! The shine it brings is so satisfying! For the really tough crud I used my nylon brush wheels attached to a drill, similar to these. (I bought these for restoring all the paint-crusted trim on my Glamper!)
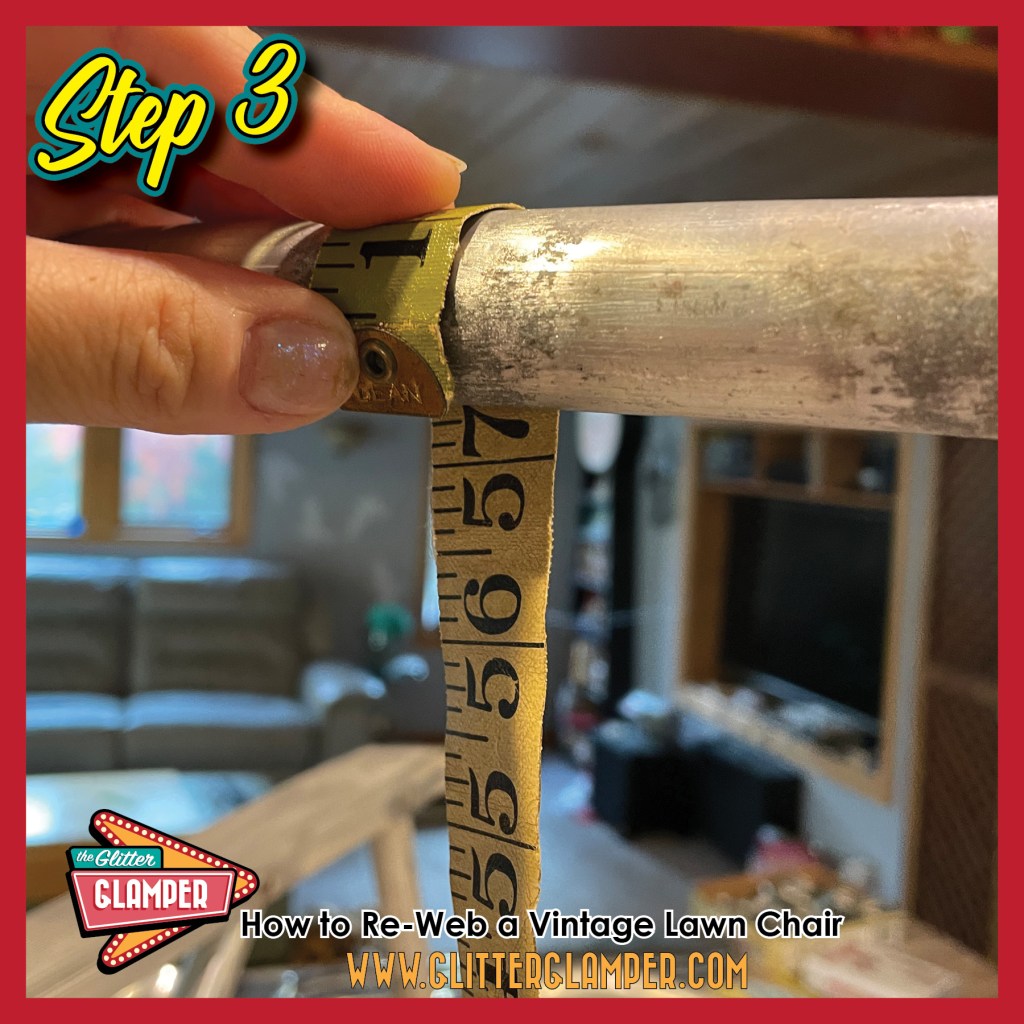
STEP 3 – Measure. Once you’ve removed all the old stuff and polished up the aluminum to your liking, it’s time to measure your strips of webbing. I started with all the longest pieces, the ones that stretch from the top of the chair back, around the hinge, and down over the front of the seat. NOTE: When measuring from “hole to hole,” make sure you feed your measuring tape around the pipes and back hinge bar the way the webbing will go. I first made the mistake of just measuring hole to hole like the instructions said, and it was too short. Read your particular webbing’s instructions. Mine is 2.25″ webbing, and the instructions say to add 3.5 inches to my measurement, and that’s what I did. This gives you just enough extra to fold the ends that will be screwed on.
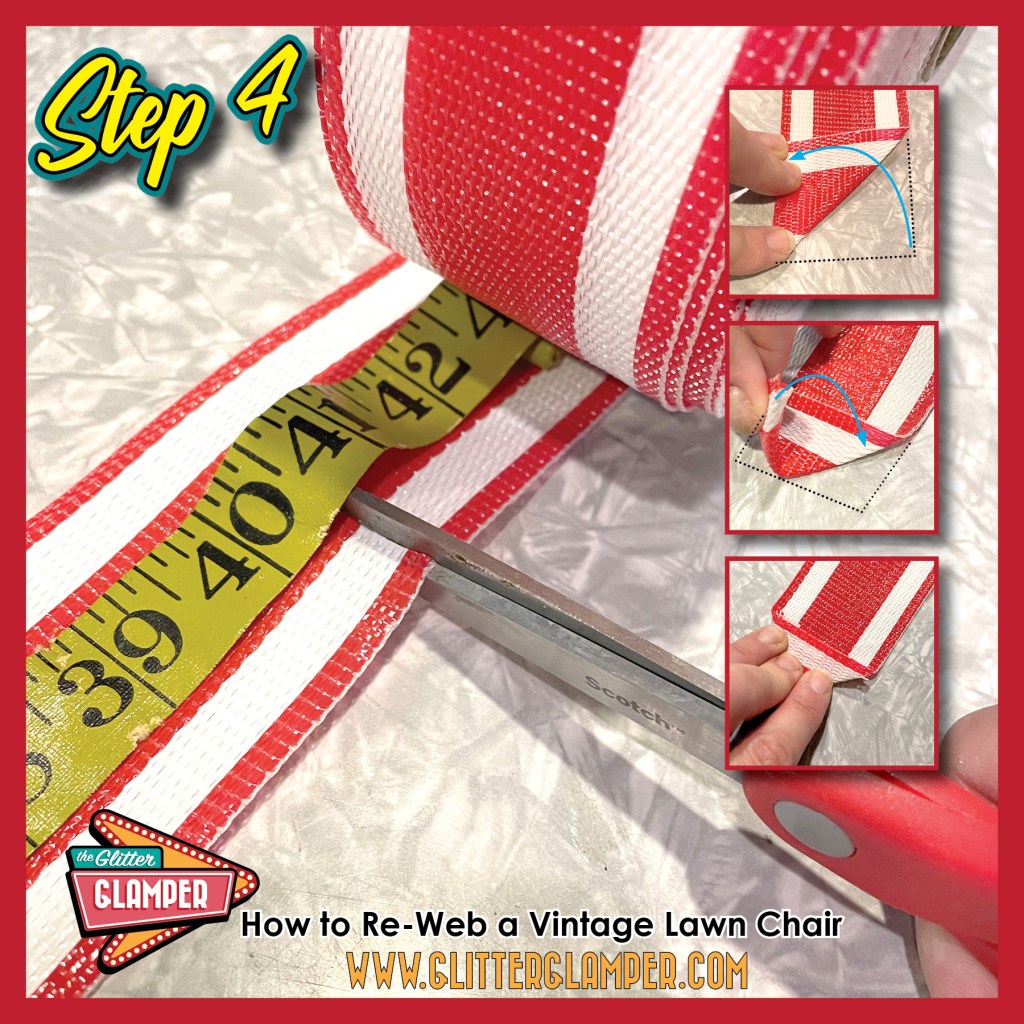
STEP 4 – Cut and fold. Once you’ve measured your first piece and added the amount the manufacturer says to add, cut a piece and fold the ends into triangles as shown in the detail views above. The first fold should line up with the opposite edge. The second fold creates a point right in the center of the strap. Crease it to create a point on each end.
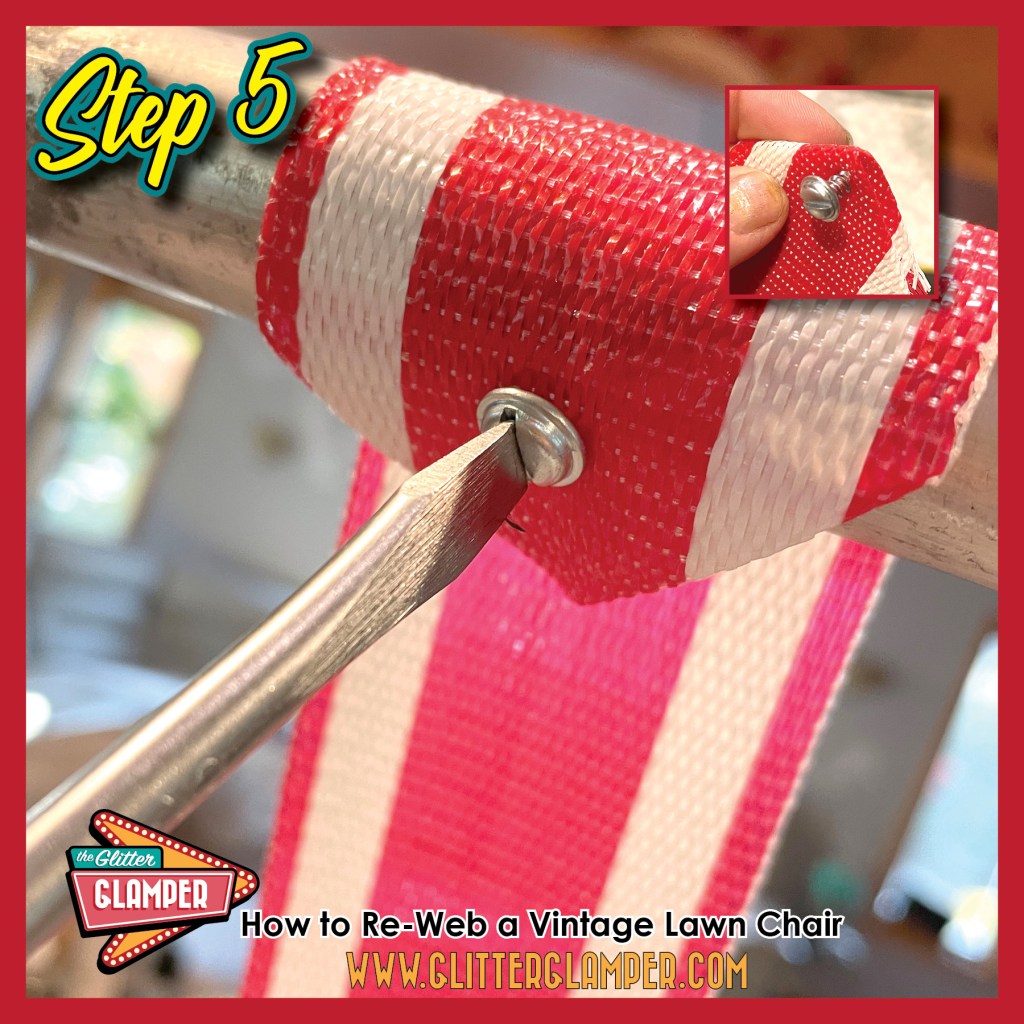
STEP 5 – Screw on. It helps to start the screw by hand…push it through the point in the webbing and twist the screw with your thumbs until it sticks through all the layers and pokes out the back. This will make it way easier to line up and screw in all of the screws! Now align the pointed end of the screw with a hole on the front edge of the seat base.

STEP 6 – Finish vertical webs. Thread your first strip up and over the top of the front pipe of the seat base, under the back rail of the seat where it hinges, and up to the top of the seat back, making sure the webbing goes over the front of the pipes. Wrap around towards the back, fold over the top edge, push that screw through the point again to get it started, align it with the top hole and screw in. Your first web is done! Now just repeat this step for the other four vertical strips.
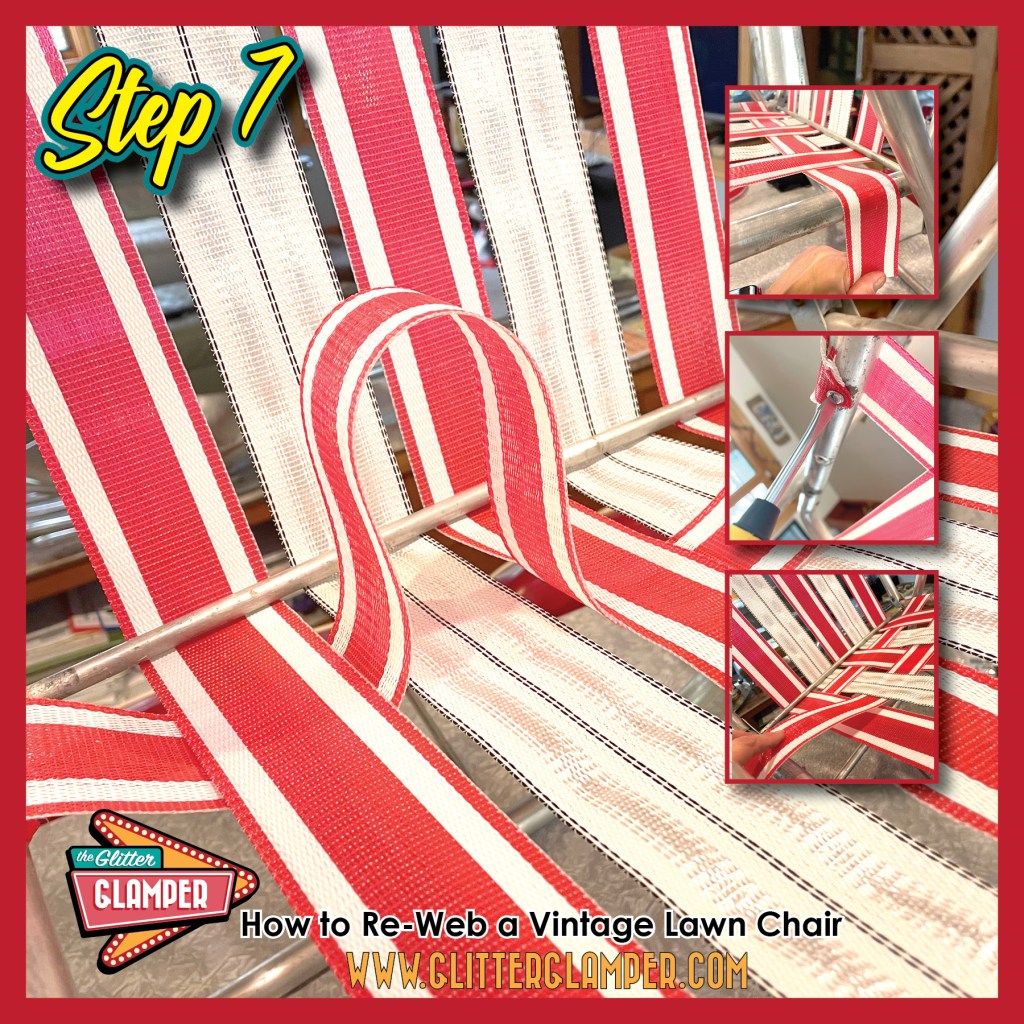
STEP 7 – Attach horizontal webs. Now you just do the same thing for the horizontal webs. But, these of course are shorter, so make sure to take a new measurement from one hole, up over the pipe, down around the other side and to the second hole. Add that same length the manufacturer tells you, cut, fold the points, and attach them all. I started with the back web on the seat base. Attach one screw, wrap the web up and over the pipe, then go over, under, over, under, etc until you reach the other side. Be sure to alternate with each strip, starting by going over that first vertical piece, then under it for the next strip, etc so that you get a nice, tight, alternating weave.

Now, kick back in your beautiful “new” retro chair and enjoy a plaid thermos of hot cocoa by the fire!
Gretchen Fleener is the owner of the “Glitter Glamper,” a retro 1963 camper that brings temporary body bling to special events in and around the Twin Cities in Minneapolis/St. Paul Minnesota, including the Minnesota State Fair, Carver County Fair, and various private events. Learn more about her business at www.GlitterGlamper.com, and be sure to like and follow her on Facebook and Instagram at @glitterglamper!
